Welcome to the HSC kitchen classroom...

Hi kids and parents!

I'm so excited to have a place to share recipes, pictures, and fun bits of information about our cooking and sewing classes at HSC. I hope you enjoy having the recipes earlier then the end of semester and I would love to hear comments after you've tried any recipes at home. I'll also post pictures of us cooking and sewing as we progress through the school year. I will let this space evolve as I see what else we can post about our time in the HSC kitchen classroom.

I'll see you in the kitchen!

Miss Stacy

Thursday, November 4, 2010

Great Week at HSC!


I wanted to say thank you for all the feedback I've been getting from parents and kids about the kitchen blog.  I really enjoy posting the recipes and pictures of sewing projects, I'm just not very good at keeping up each week!  Thank you for being patient while I get my blogging habits in check.

I also wanted to share how much I appreciate all your kind words and prayers for my family as we are navigating through this new kind of normal that has entered our lives.   Priorities are put into perspective very quickly these days.  Spending time with your kids each week has been such a blessing to me and my family.   My kids love to hear what we've cooked for class that day and what types of sewing projects we are working on.  Of course my own kids have  been my "practice" students for recipes and projects for years and haven't even known it.  What a perfect set up I have to prepare to teach your kids.  This week just seemed to be extra special and I wanted to let you know what a great job they did in cooking and sewing.  In cooking class we made spaghetti pie, which took a while to bake so we had extra time at the end of class.  I told the kids there would be a non cooking activity to do until our food was ready.   I had made up a custom word search paper on the computer using words all about our past recipes and things we use in the kitchen each week.  Some of them were a little unsure of the activity at first but as they started talking and sharing they really had fun.  The team work was amazing!  I loved seeing their excitement as each new word was found.  The enjoyment of helping a friend locate a difficult word was contagious.  The first one to find a new word would share clues for the others.  It really was a joy to watch the interactions.

The sewing kids are doing a fabulous job!  I love to see how much creativity is happening in class.  It makes me smile when I hear them chatting with each other about wanting to sew at home or what projects they want to do next.  It's fun to see their excitement when I bring in new fabrics for them to use.  I challenged the hand sewers to thread their own needles today.  (It takes a lot of time to rethread 6 needles over and over again!)  Some weren't sure, but I just said to concentrate and be very still with their hands and keep trying.  They all did it!  The pride of accomplishment was just wonderful. 

Just a glimpse into the kitchen this week at HSC.  Your kids brought me such joy! 
Thank you and have a great rest of your week,


Miss Stacy

Monday, November 1, 2010

French Toast and Fruit Smoothies


Ugh! Sorry I haven't kept up each week with recipes.  Eventually they'll all get here.
Thanks for your patience.


French Toast
2 eggs
1/2 cup milk
1/2 teaspoon ground cinnamon
2 Tablespoon butter or margarine
6 slices firm textured bread
sliced fruit, powdered sugar, syrup
Crack eggs into a mixing bowl.  Beat with a fork until yolks and whites are mixed together.  Add milk and, if you like, cinnamon.  Beat until ingredients are well mixed.  Pour egg mixture into a pie plate or pan.
Put half of the butter into a skillet on the stove with the burner turned to medium high heat.  Let the butter melt.
Dip one slice of bread into egg mixture.  Turn bread over to coat the other side too.  Put coated bread in skillet.  Cook until bottom of bread is light brown. (To check, lift bread with a spatula to peek underneath).  This will take 1 1/2 – 2 minutes.  Turn bread over.  Cook until second side is light brown too.  Remove toast from the skillet.
Repeat with remaining slices of bread.  Recoat skillet with more butter as needed.
Fruit Smoothies
1 small ripe banana
2 cups frozen unsweetened strawberries
1 8oz carton of strawberry or vanilla yogurt
3/4 cup milk
Put banana (cut into chunks), frozen strawberries, yogurt and milk into a blender.  Blend until smooth.  Pour into glasses and enjoy!

Monday, October 18, 2010

Mastering Button flowers

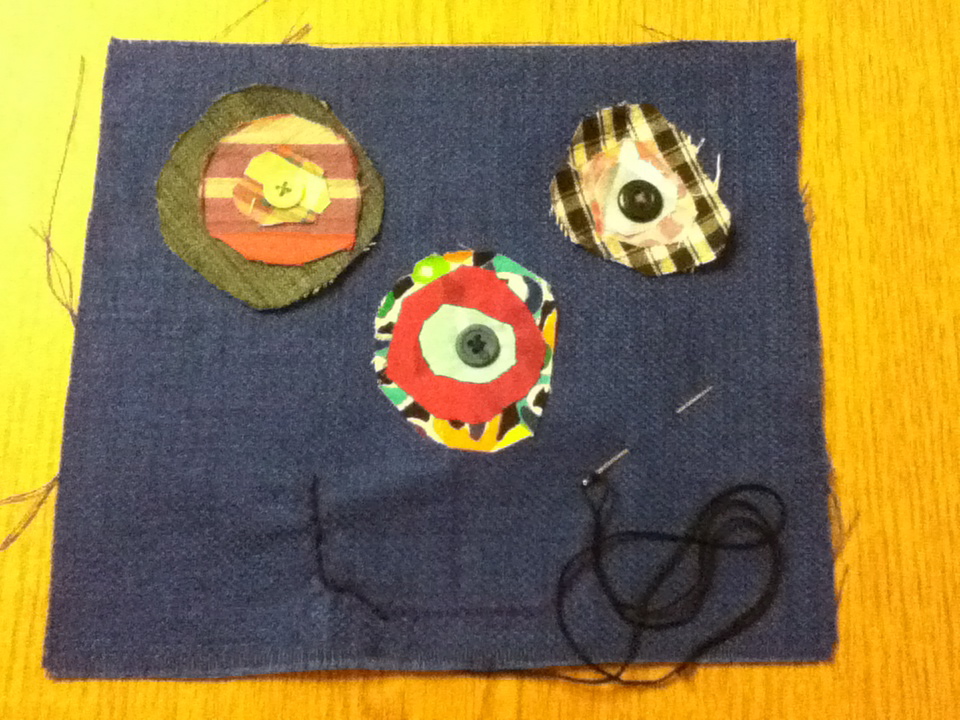
 Here are some more works of art from our aspiring HSC sewers.


Here are some more wonderful works of art from our aspiring sewers at HSC.

Cross between a cookie and a granola bar


Week 3 in cooking class we made a sweet treat, Fruity Oat Bars with apricots.  The reviews were mixed from the kids, but it was decided that possibly changing the fruit choice could be good for some.  Votes were in for strawberry, raspberry, blueberry... okay most berries were thought to be good idea by most kids  Some kids thought maybe trying their favorite jelly or jam flavors would be good.  I agreed and let them know that is what is so fun about cooking and baking, you can switch things out if flavors aren't working for you.  We like to say here in the kitchen at HSC,
"I'm not a fan of _______."  You can fill in the blank for whatever may be in a recipe that isn't something you like to eat.  I've also tried to teach the kids how flavors change as they are mixed or cooked a certain way.  For example,  onions,  raw they can be spicy.  When onions are cooked they have a more mild flavor.  And if you really saute onions well and "caramelize" them, they will taste much sweeter.   Enjoy experimenting with different ingredients and flavors while trying out this fun recipe.

Fruity Oat Bars
1 cup ready-to-eat dried apricots
2 Tablespoons water
2 1/3 cups whole wheat flour
1 cup oats
1/2 teaspoon salt
1 3/4 sticks unsalted butter
3/4 cup turbinado sugar
2 Tablespoons light corn syrup

Preheat the oven to 400 degrees.  Grease a 7 inch square cake pan and then line the bottom with parchment paper.  Put the apricots and water into a blender or food processor.  Process the apricots until they are a puree (like jelly).  Set the apricot puree aside to be used later.  Put the flour, oats and salt in a mixing bowl and stir with a fork until combined.
Melt the butter, sugar, and syrup in a saucepan over low heat.  Stir the mixture occasionally until the butter has completely melted.  Pour the butter mixture into the mixing bowl containing the flour, oats, and salt.  Stir until everything is combined in a sticky, oaty mixture. 
Press half the mixture into the bottom of the cake pan and smooth it to make an even layer.  Carefully spread the apricot puree over the oaty layer.  Press the rest of the mixture over the apricot puree until it is covered. 
Bake for 25-30 minutes or until the oats are golden on the top.  Remove from the oven and leave to cool for 5 minutes.  Divide the bars into squares and leave them to cool completely in the pan before scooping them out to serve. 

Saturday, October 2, 2010

Buttons, Buttons, Buttons


 I have always loved buttons.  There is something so soothing about digging your hands into a jar of buttons and letting them fall between your fingers.  I think the unique colors and styles of each button has always fascinated me as well.  My own kids love to search through my containers, so I had no doubt that my HSC kids would feel the same way.  My feelings were right and we have had a blast searching and sharing our finds with friends in class.  We've talked about the differences between shank buttons and standard buttons.  And we've talked about the amount of holes in a button and how you need to be sure your buttons are securely sewn on to your clothing to help them work properly.  After sorting and discussing all the different aspects of buttons, the kids starting sewing on buttons to create designs on fabric.  Some created their initials with buttons and others stacked shapes of different fabrics to create flowers and patterns.  The pictures posted show some of the fun projects they've done or are still working on.


Friday, October 1, 2010

What's Your Favorite Topping?


The second week of cooking class the kids got pretty excited about making their very own pizza.  Some were disappointed when I told them our topping for the day was cheese.  "That's it?" some asked.  I let them know that for everyone's sake that would be the best choice but that they could create a special pizza at the end of class.  They were intrigued and at the end of class they found out they got to color their favorite toppings onto a paper pizza.  We have those pictures in their cook books that will be coming home at the end of the semester.  The kids enjoyed rolling out their own pizza dough and even got creative with the shape of the pizzas.  They especially liked tasting them at the end of class and at lunchtime.  I hope you'll have the chance at home to have a pizza night and use what ever your favorite toppings are on your very own mini pizzas.


Mini Pizzas


dough ingredients
2 1/4 white or whole wheat self-rising flour (plus extra for dusting)
1/2 teaspoon salt
1/2 - 2/3 cups milk
4 Tablespoons olive oil

topping ingredients
tomato sauce or marinara sauce
5 - 6 oz ball of mozzarella cheese
1/2 cup cheddar cheese

useful equipment
sieve
large mixing bowl
fork
rolling pin
2 large baking sheets or pizza pans
spoon or rubber spatula

Preheat the oven to 400 degrees.  Sift the flour and salt into a mixing bowl, and then make a well in the center of the mixture.  Pour the milk and oil into the well.  Mix with a fork until the flour and liquids start to come together and form a soft dough.  Lightly dust a work top and your hands with flour.  Tip the dough out of the bowl and knead it for about 1 minute to form a smooth ball.  Dust 2 baking sheets with flour.  Divide the dough in smaller balls (depends on how many mini pizzas are being made).  Using a rolling pin, roll each piece into a circle.  Carefully place the dough circles on each baking sheet.  Top each dough circle with some tomato sauce or marinara sauce.  Using the back of the spoon or a rubber spatula, spread the sauce in an even layer almost to the edge of the pizza dough.  Slice the mozzarella ball into small slices.  Add the mozzarella and any other toppings.  Top with the cheddar cheese.  Bake the pizzas for 10 minutes or until the dough has risen and the top is golden.   


Colorful Collages of Fabric

In the first couple weeks of sewing at HSC we have explored the many different types of fabrics.  The kids enjoyed digging through big tubs of fabric scraps that I've collected for a good many years.  They cut and glued their choices onto paper to create fabulous fabric creations.


We talked about colors and textures of fabrics.  If a fabric is woven or knit and if the fabric was thread dyed or printed.  Some of the favorites were the purple with shiny dots and the blue faux fur.  Can you spot them?