Welcome to the HSC kitchen classroom...

Hi kids and parents!

I'm so excited to have a place to share recipes, pictures, and fun bits of information about our cooking and sewing classes at HSC. I hope you enjoy having the recipes earlier then the end of semester and I would love to hear comments after you've tried any recipes at home. I'll also post pictures of us cooking and sewing as we progress through the school year. I will let this space evolve as I see what else we can post about our time in the HSC kitchen classroom.

I'll see you in the kitchen!

Miss Stacy

Monday, December 6, 2010

Chick-N-Broccoli Pot Pies


Photo by Munchkin Mama (funny found this photo for the exact recipe we used!)
 This was a recipe from my church cookbook published back in 1987! My mom put the recipe in the book and used to make these for my brother and I when we were kids. When I was looking for a picture to post I found a site that had the exact same recipe and a cute picture too.  Must have been a recipe from some other place from way back in the day! :-)
Chick-N-Broccoli Pot Pies
10 oz. can refrigerator biscuits
2/3 cup shredded cheddar cheese
2/3 cup crisp rice cereal
2 Tablespoon butter
1 cup cooked, cubed chicken
1 can cream of chicken soup
10 oz package frozen broccoli chopped
Separate biscuit dough into the 10 biscuits.  Place each biscuit in ungreased muffin  cup.  Press dough to cover bottom and sides.  In class we flattened the dough into a circle larger then the muffin cup top then carefully pressed the edges into the muffin cup.  The center of the dough was not touching the bottom of the muffin cup.  It looked like a mini trampoline.  The dough will go down as the rest of the ingredients are added to the “pot pies”. 
Next, spoon a little shredded cheese, then a spoonful of cereal into the cups, dot with butter.  Combine the chicken, soup and broccoli, spoon about 1/3 cup over the cereal and butter.  Bake in  preheated 375 degree oven for 20-25 minutes or until biscuits are deep brown. 
Tip: To make ahead, prepare, cover and refrigerate up to two hours.  Bake as directed.

Saturday, November 27, 2010

Green Grocery Bag Challenge


After hearing about the possible link of lead in reusable grocery bags made in China, my heart just sank.  After finally getting so many people on board to shop with cloth bags it seemed to be a slap in the face for all the efforts.  However....there is a better way!  I was privileged to learn about the Green Bag Lady from a friend's blog about a year ago.  And now, Sew Mama Sew has put a challenge on the table...the sewing table that is.  Green Grocery Bag Challenge is a way for each of us to really use our resources and abilities to help out one gift at a time this Christmas season and beyond.  Check out all the highlighted links and learn more about this great idea.

ps.  I was fortunate enough to win a Green Bag Lady bag (#8321) for myself and one to give away to a friend last year. 


13,445 Green Bag Lady Bags Given Away!

Green Bag Lady bags are being used in 2415 cities in every U.S. state
plus 349 cities in 206 territories/provinces/countries world wide


It really has made an impact on me and my family to reuse bags and take along our own whenever possible.

Sunday, November 7, 2010

One word...one syllable...Wok! You Got It!


 Stir Fry!

Okay, so I just checked and there are 2 recipes I haven't posted for you yet, Quick Cherry Cheesecake and Cloudy with a Chance of Meatballs.  So I'll work on those this week.  But I did just write up and send off to Miss Bobbi the Garlic Chicken Stir Fry recipe.  So I figured I post that one today.


The kids were giving me puzzled looks when I play charades with then to figure out what type of pan we were using that day.  Some classes got it, others were a little confused with my game playing in the kitchen.  But it was a fun conversation after they discovered the pan was called a wok.   I assured them that you could make a stir fry in a skillet too and that most of their kitchens probably had something that would work just fine.  We talked about how a stir fry would be in the healthy food category since you use little oil and it cooks up so quick.  I was surprised that there weren't more kiddos that squawked at mushrooms in our stir fry, so don't think you have to always leave out those fun fungi on account of the kids.  I also told them that if they didn't chop or slice them too small they were easy to pick out if needed.  So here's the recipe.  As always I would love to hear your comments if you do make a recipe.  Let me and all the others know how it turned out and what changes you may have done to adjust it to your family's liking.

Garlic Chicken Stir Fry

4 medium chicken breasts
1/2 cup water
1 instant chicken bullion cube
2 tablespoons soy sauce
1 tablespoon cornstarch
1 tablespoon rice wine vinegar
1 tablespoon vegetable oil
1 tablespoon minced garlic
6 oz sliced mushrooms
4 green onions thinly sliced
8 oz can water chestnuts, sliced
3 cups hot rice
Cut chicken into small chunks about 1/2 inch in size.  Heat the water in microwave safe container until hot and add bullion cube, set that aside until it’s dissolved.  Combine soy sauce, cornstarch and vinegar in a small bowl.  Once the bullion is dissolved add it to the soy sauce mix. 
Add oil to a wok or a large skillet.  Heat over med/hi heat.  Stir fry the garlic for 15 seconds, then add mushrooms and onions.  Continue stir frying about 1 more minute or until tender.  Remove the veggies from your pan so they do not over cook.  If you need a bit more oil add it into wok or skillet then add your chicken.  Stir fry until there is no more pink color, about 2 -3 minutes.  Push the chicken away from the center of the wok or pan so that the soy sauce mix can be added and stirred to thicken.  Once it feels a little thick you can return the veggies and add in the water chestnuts too.  Stir everything together in your wok or skillet until it’s heated through.  Serve your garlic chicken stir fry over rice. 


Friday, November 5, 2010

Preztels Anyone?


The weeks recipes may not come in order but since I had written the pretzel recipe up to be printed I figured it was good to post it next.  Super easy recipe and very good for a snack on these coming colder days?  I think they are coming.  But November sure has been warm so far.

 
:Super Easy Soft Pretzels:
makes 14 pretzels
1 loaf frozen white bread dough, thawed
all purpose flour, for dusting surface
1 egg, lightly beaten
coarse salt (optional)
Line a sheet pan with waxed paper.  Divide dough into 14 pieces. On a lightly floured surface, roll each piece of dough into a 16 inch rope and form into a pretzel shape.  Transfer dough to the prepared sheet pan, cover and refrigerate until ready to boil.  Preheat oven to 400 degrees.  Lightly grease another sheet pan.  In a large pot, bring 4 quarts of water to a boil.  Add pretzels, 3 at a time, and cook until pretzels rise to the surface.  This takes about 2 minutes each time.  Remove and drain on paper towels.   Arrange pretzels 3 inches apart on prepared sheet pan.  Brush with beaten egg.  Sprinkle with salt or choice of toppings.   Bake for 15 – 20 minutes or until brown.

Garlic Cheese --- 1/2 cup finely grated parmesan and 1 teaspoon garlic powder
Cinnamon Sugar --- 1/2 cup powdered or granulated sugar and 1 Tablespoon ground cinnamon


This is another recipe I was hoping to use with the older kids but realized our time was too limited.  I haven't tried it yet myself but hope to soon at home.  I you try it out please let me know how it turns out. 

: Soft Pretzel Recipe :

2 packages or 2 Tablespoons active dry yeast
2 cups warm water
1/2 cup sugar
2 teaspoons salt
1/4 cup butter softened
2 eggs
6 to 7 cups all-purpose flour
1 egg white for brushing the tops

Pour water in measuring cup and heat water in the microwave to lukewarm, about 110 degrees. Add sugar to water and stir to dissolve. Add yeast into water. Allow yeast to bubble and foam for several minutes.

Meanwhile in mixing bowl add salt, soft butter, 2 eggs and 3-4 cups flour. Blend together. Add in yeast mixture and remaining cups of flour. Blend until dough forms a ball. Knead on a floured surface several minutes.

Pull off pieces of dough and roll into ropes. Then cross ends over to make an X and form dough into a pretzel shape. Place on greased cookie sheets. In small bowl whisk egg white. With a pastry brush, brush tops of pretzels. Bake at 400 degrees for 12-15 minutes until golden brown.

Thursday, November 4, 2010

Great Week at HSC!


I wanted to say thank you for all the feedback I've been getting from parents and kids about the kitchen blog.  I really enjoy posting the recipes and pictures of sewing projects, I'm just not very good at keeping up each week!  Thank you for being patient while I get my blogging habits in check.

I also wanted to share how much I appreciate all your kind words and prayers for my family as we are navigating through this new kind of normal that has entered our lives.   Priorities are put into perspective very quickly these days.  Spending time with your kids each week has been such a blessing to me and my family.   My kids love to hear what we've cooked for class that day and what types of sewing projects we are working on.  Of course my own kids have  been my "practice" students for recipes and projects for years and haven't even known it.  What a perfect set up I have to prepare to teach your kids.  This week just seemed to be extra special and I wanted to let you know what a great job they did in cooking and sewing.  In cooking class we made spaghetti pie, which took a while to bake so we had extra time at the end of class.  I told the kids there would be a non cooking activity to do until our food was ready.   I had made up a custom word search paper on the computer using words all about our past recipes and things we use in the kitchen each week.  Some of them were a little unsure of the activity at first but as they started talking and sharing they really had fun.  The team work was amazing!  I loved seeing their excitement as each new word was found.  The enjoyment of helping a friend locate a difficult word was contagious.  The first one to find a new word would share clues for the others.  It really was a joy to watch the interactions.

The sewing kids are doing a fabulous job!  I love to see how much creativity is happening in class.  It makes me smile when I hear them chatting with each other about wanting to sew at home or what projects they want to do next.  It's fun to see their excitement when I bring in new fabrics for them to use.  I challenged the hand sewers to thread their own needles today.  (It takes a lot of time to rethread 6 needles over and over again!)  Some weren't sure, but I just said to concentrate and be very still with their hands and keep trying.  They all did it!  The pride of accomplishment was just wonderful. 

Just a glimpse into the kitchen this week at HSC.  Your kids brought me such joy! 
Thank you and have a great rest of your week,


Miss Stacy

Monday, November 1, 2010

French Toast and Fruit Smoothies


Ugh! Sorry I haven't kept up each week with recipes.  Eventually they'll all get here.
Thanks for your patience.


French Toast
2 eggs
1/2 cup milk
1/2 teaspoon ground cinnamon
2 Tablespoon butter or margarine
6 slices firm textured bread
sliced fruit, powdered sugar, syrup
Crack eggs into a mixing bowl.  Beat with a fork until yolks and whites are mixed together.  Add milk and, if you like, cinnamon.  Beat until ingredients are well mixed.  Pour egg mixture into a pie plate or pan.
Put half of the butter into a skillet on the stove with the burner turned to medium high heat.  Let the butter melt.
Dip one slice of bread into egg mixture.  Turn bread over to coat the other side too.  Put coated bread in skillet.  Cook until bottom of bread is light brown. (To check, lift bread with a spatula to peek underneath).  This will take 1 1/2 – 2 minutes.  Turn bread over.  Cook until second side is light brown too.  Remove toast from the skillet.
Repeat with remaining slices of bread.  Recoat skillet with more butter as needed.
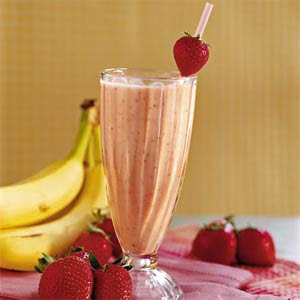
Fruit Smoothies
1 small ripe banana
2 cups frozen unsweetened strawberries
1 8oz carton of strawberry or vanilla yogurt
3/4 cup milk
Put banana (cut into chunks), frozen strawberries, yogurt and milk into a blender.  Blend until smooth.  Pour into glasses and enjoy!

Monday, October 18, 2010

Mastering Button flowers

 Here are some more works of art from our aspiring HSC sewers.


Here are some more wonderful works of art from our aspiring sewers at HSC.

Cross between a cookie and a granola bar


Week 3 in cooking class we made a sweet treat, Fruity Oat Bars with apricots.  The reviews were mixed from the kids, but it was decided that possibly changing the fruit choice could be good for some.  Votes were in for strawberry, raspberry, blueberry... okay most berries were thought to be good idea by most kids  Some kids thought maybe trying their favorite jelly or jam flavors would be good.  I agreed and let them know that is what is so fun about cooking and baking, you can switch things out if flavors aren't working for you.  We like to say here in the kitchen at HSC,
"I'm not a fan of _______."  You can fill in the blank for whatever may be in a recipe that isn't something you like to eat.  I've also tried to teach the kids how flavors change as they are mixed or cooked a certain way.  For example,  onions,  raw they can be spicy.  When onions are cooked they have a more mild flavor.  And if you really saute onions well and "caramelize" them, they will taste much sweeter.   Enjoy experimenting with different ingredients and flavors while trying out this fun recipe.

Fruity Oat Bars
1 cup ready-to-eat dried apricots
2 Tablespoons water
2 1/3 cups whole wheat flour
1 cup oats
1/2 teaspoon salt
1 3/4 sticks unsalted butter
3/4 cup turbinado sugar
2 Tablespoons light corn syrup

Preheat the oven to 400 degrees.  Grease a 7 inch square cake pan and then line the bottom with parchment paper.  Put the apricots and water into a blender or food processor.  Process the apricots until they are a puree (like jelly).  Set the apricot puree aside to be used later.  Put the flour, oats and salt in a mixing bowl and stir with a fork until combined.
Melt the butter, sugar, and syrup in a saucepan over low heat.  Stir the mixture occasionally until the butter has completely melted.  Pour the butter mixture into the mixing bowl containing the flour, oats, and salt.  Stir until everything is combined in a sticky, oaty mixture. 
Press half the mixture into the bottom of the cake pan and smooth it to make an even layer.  Carefully spread the apricot puree over the oaty layer.  Press the rest of the mixture over the apricot puree until it is covered. 
Bake for 25-30 minutes or until the oats are golden on the top.  Remove from the oven and leave to cool for 5 minutes.  Divide the bars into squares and leave them to cool completely in the pan before scooping them out to serve. 

Saturday, October 2, 2010

Buttons, Buttons, Buttons


 I have always loved buttons.  There is something so soothing about digging your hands into a jar of buttons and letting them fall between your fingers.  I think the unique colors and styles of each button has always fascinated me as well.  My own kids love to search through my containers, so I had no doubt that my HSC kids would feel the same way.  My feelings were right and we have had a blast searching and sharing our finds with friends in class.  We've talked about the differences between shank buttons and standard buttons.  And we've talked about the amount of holes in a button and how you need to be sure your buttons are securely sewn on to your clothing to help them work properly.  After sorting and discussing all the different aspects of buttons, the kids starting sewing on buttons to create designs on fabric.  Some created their initials with buttons and others stacked shapes of different fabrics to create flowers and patterns.  The pictures posted show some of the fun projects they've done or are still working on.


Friday, October 1, 2010

What's Your Favorite Topping?


The second week of cooking class the kids got pretty excited about making their very own pizza.  Some were disappointed when I told them our topping for the day was cheese.  "That's it?" some asked.  I let them know that for everyone's sake that would be the best choice but that they could create a special pizza at the end of class.  They were intrigued and at the end of class they found out they got to color their favorite toppings onto a paper pizza.  We have those pictures in their cook books that will be coming home at the end of the semester.  The kids enjoyed rolling out their own pizza dough and even got creative with the shape of the pizzas.  They especially liked tasting them at the end of class and at lunchtime.  I hope you'll have the chance at home to have a pizza night and use what ever your favorite toppings are on your very own mini pizzas.


Mini Pizzas


dough ingredients
2 1/4 white or whole wheat self-rising flour (plus extra for dusting)
1/2 teaspoon salt
1/2 - 2/3 cups milk
4 Tablespoons olive oil

topping ingredients
tomato sauce or marinara sauce
5 - 6 oz ball of mozzarella cheese
1/2 cup cheddar cheese

useful equipment
sieve
large mixing bowl
fork
rolling pin
2 large baking sheets or pizza pans
spoon or rubber spatula

Preheat the oven to 400 degrees.  Sift the flour and salt into a mixing bowl, and then make a well in the center of the mixture.  Pour the milk and oil into the well.  Mix with a fork until the flour and liquids start to come together and form a soft dough.  Lightly dust a work top and your hands with flour.  Tip the dough out of the bowl and knead it for about 1 minute to form a smooth ball.  Dust 2 baking sheets with flour.  Divide the dough in smaller balls (depends on how many mini pizzas are being made).  Using a rolling pin, roll each piece into a circle.  Carefully place the dough circles on each baking sheet.  Top each dough circle with some tomato sauce or marinara sauce.  Using the back of the spoon or a rubber spatula, spread the sauce in an even layer almost to the edge of the pizza dough.  Slice the mozzarella ball into small slices.  Add the mozzarella and any other toppings.  Top with the cheddar cheese.  Bake the pizzas for 10 minutes or until the dough has risen and the top is golden.   


Colorful Collages of Fabric

In the first couple weeks of sewing at HSC we have explored the many different types of fabrics.  The kids enjoyed digging through big tubs of fabric scraps that I've collected for a good many years.  They cut and glued their choices onto paper to create fabulous fabric creations.


We talked about colors and textures of fabrics.  If a fabric is woven or knit and if the fabric was thread dyed or printed.  Some of the favorites were the purple with shiny dots and the blue faux fur.  Can you spot them?

Sunday, September 19, 2010

Double Lime Coolers...Yum!

We had a great first week in the HSC kitchen.  After getting to know each others names and a bit about what types of foods we each liked, we created magazine collages.  Most every type of food was represented on our creative collages and will come home this next week for the kids to share with you.  Then to start off the semester we discussed recipes and how to create something great to eat or drink by combining different types of ingredients.  Our first recipe was for a yummy drink.  It was met by mixed reviews based on how sweet or sour the kids thought the drink was.   The kids decided that this drink recipe would be great during the summer time or at a special occasion party.  Parents you'll be happy that we all agreed it would be too sweet to drink every night at dinner!
  
Double Lime Coolers

2 cups lime sherbet
7 ounces chilled ginger ale
1/2 cup water
1 cup frozen limeade concentrate


Stir the sherbet to soften.  Slowly stir in ginger ale, water, and frozen limeade. 
Serve immediately.  Enjoy!